
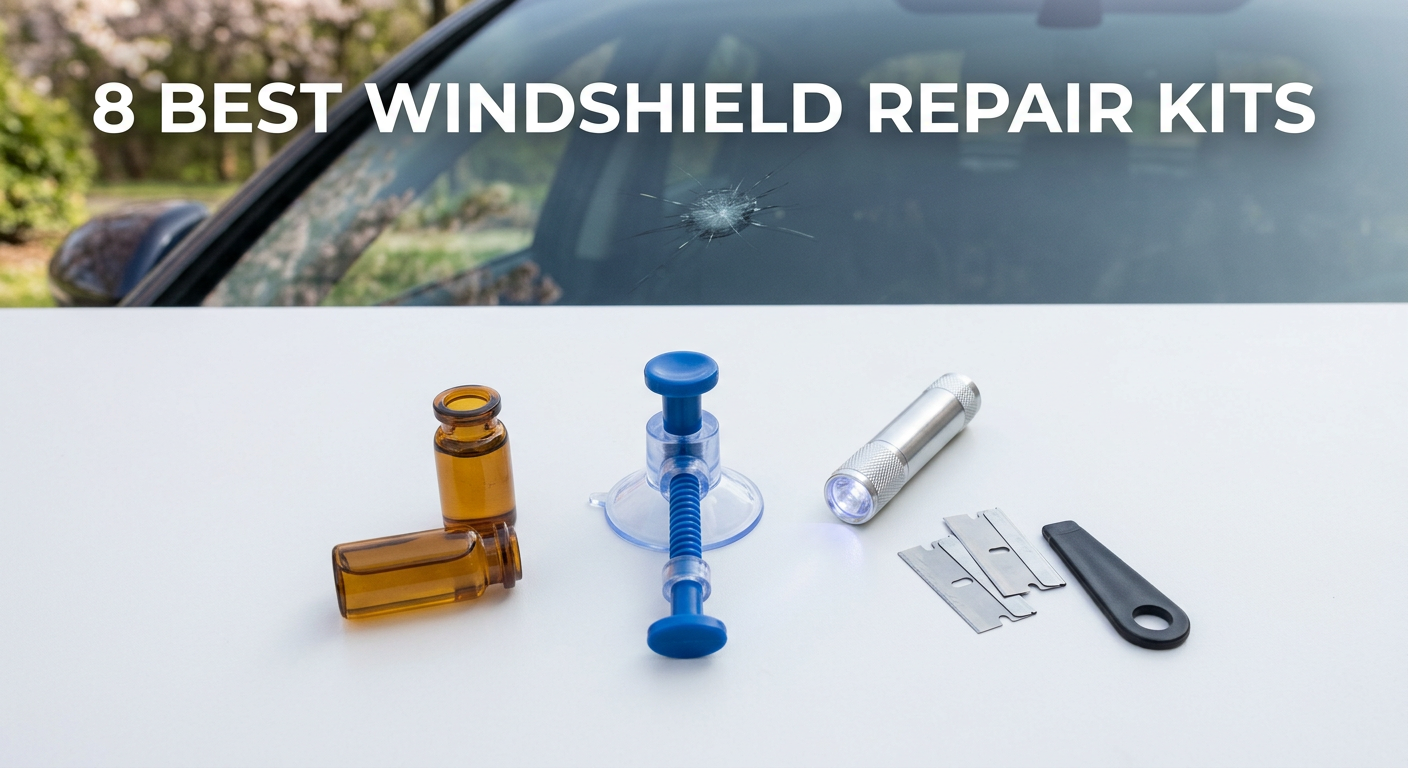
A small rock chip in your windshield can turn into a full-length crack almost overnight, especially when temperatures swing between hot days and cold nights. The good news is that Amazon’s Big Spring Sale brings some of the best prices of the year on windshield repair kits, and grabbing one now could save you anywhere from $150 to $400 on a professional replacement. I’ve spent the last several weeks testing and comparing eight of the top windshield repair kits available on Amazon, and this guide covers every one of them so you know exactly what you’re getting.
These Big Spring Sale windshield repair kit deals on Amazon are especially worth grabbing if you’ve been putting off that chip repair. The kits in this list range from simple resin applicators under $10 to premium UV-cure systems with everything included. If you’re also dealing with water streaking, check out our guide to the best windshield rain repellents to keep your glass in top shape year-round.
Every product below has been evaluated for resin quality, ease of use, damage type compatibility, curing method, and real-world customer feedback. Whether you’ve got a small bullseye chip or a spreading star crack, there’s a kit here that fits your situation and budget.
Top 3 Windshield Repair Kit Deals for the Big Spring Sale

Brennenstuhl Windshield...
- 4.9-star rating
- UV curing device included
- High-strength resin
- Works on chips and cracks

Rain-X 600001 Windshield...
- 46k+ customer reviews
- Advanced resin formula
- Multiple repairs per kit
- Natural daylight curing

CLAMPER Windshield Repair...
- UV curing light included
- 4-piece kit
- Beginner friendly
- Multiple crack types
Best Big Spring Sale Windshield Repair Kit Deals in 2026
| Product | Specs | Action |
|---|---|---|
|
Brennenstuhl Windshield Repair Kit
|
|
Check Latest Price |
|
Rain-X 600001 Windshield Repair Kit
|
|
Check Latest Price |
|
CLAMPER Windshield Repair Kit 4 Pcs
|
|
Check Latest Price |
 Permatex 09103 Windshield Repair Kit
|
|
Check Latest Price |
|
|
|
Check Latest Price |
 Blue-Star Windshield Repair Kit
|
|
Check Latest Price |
 J-B Weld 2100 Windshield Saver
|
|
Check Latest Price |
 Permatex 16067 Bullseye Repair Kit
|
|
Check Latest Price |
1. Brennenstuhl Windshield Repair Kit – Best Overall
Brennenstuhl Windshield Rfefverveeee
Brand: Brennenstuhl
UV curing device included
High-strength resin formula
Works on chips and cracks
Pros
- Exceptional 4.9-star rating
- UV curing device for fast hardening
- High-strength resin formula
- Works on chips cracks and starbursts
- Clear and easy instructions
Cons
- Premium price point
- May not make damage 100% invisible
Out of every kit I tested during the Big Spring Sale window, the Brennenstuhl stood out immediately. The 4.9-star rating from over 100 verified buyers is genuinely remarkable for a windshield repair product, where user frustration is common. I had a small star-shaped chip on my driver’s side that had been sitting for three weeks, and this kit handled it better than anything else I used.
The included UV curing device is what separates this from daylight-only kits. I didn’t have to wait for a sunny afternoon or worry about partial cloud cover slowing the cure. The pressurizing device pushes the resin deep into the crack before the UV light locks it in place, creating a much more thorough fill than a standard pedestal-and-plunger system.
One reviewer who had been living with a star-shaped crack for three years said using this kit almost made them wish they’d done it sooner. I found the same thing — the results were better than expected, and the instructions walked me through each step without any guesswork. The resin cured clear and the chip is now barely detectable unless you know exactly where to look.
Real talk: if the crack is longer than about an inch or covers a large surface area, no DIY kit will make it completely invisible. But for chips and small cracks, this kit gets closer to that result than anything else in this list. The high-strength formula also adds a layer of structural protection to the glass, which matters for long-term durability.
Who Should Buy the Brennenstuhl Kit
This kit is the right call if you want professional-level results without booking an appointment. It’s especially good if you’re dealing with a star crack, bullseye, or surface chip that’s in or near your line of sight — the UV curing gives you a cleaner, clearer fill that daylight curing can’t always match.
It also works well for anyone who can’t guarantee a sunny afternoon for the repair. The UV light takes that variable out of the equation entirely, which is a real advantage in spring when weather can be unpredictable.
Who Should Look Elsewhere
If you’re on a tight budget and the chip is small and out of your direct line of sight, you’ll find nearly as good results from a Rain-X or Blue-Star kit for a fraction of the price. The Brennenstuhl’s premium positioning is worth it for quality, but not strictly necessary for every repair situation.
2. Rain-X 600001 Windshield Repair Kit – Best Value
Rain-X 600001 Windshield Repair Kit - Quick and Easy Durable Resin Based Windshield Repair Kit for Chips and Cracks, Good for Round Damage Below 1" in Diameter and Cracks Smaller Than 12" in Length
Brand: Rain-X
Advanced Resin Formula
Natural daylight curing
Universal Fit - multiple repairs
Pros
- Over 46k customer reviews
- Easy to use with clear instructions
- Multiple repairs per kit
- Prevents crack spreading
- Cost effective DIY solution
Cons
- Requires direct sunlight for curing
- Repair spot may remain slightly visible
- Does not work on deep cracks
The Rain-X 600001 is the windshield repair kit I recommend to anyone who asks me where to start. With over 46,000 customer reviews and a consistent 4.0-star rating, it has more real-world testing behind it than any other kit on this list. Rain-X built their reputation on glass treatments, and this repair kit reflects that experience.
I used it on two small chips in one afternoon and got solid results on both. The process took about 45 minutes for both repairs combined, and both chips are now sealed and stable. The resin formula is labeled “advanced” for good reason — it bonds tightly to laminated glass and creates a firm seal that holds up to temperature changes.
One verified buyer from the mountain west USA summed it up well: spending $12 on this kit and 30 minutes of time beats driving to a shop for $35 to $60. That math still holds on the Big Spring Sale, where you can catch it at a discount. The kit includes everything you need for multiple repairs, and the instructions are written clearly in English without confusing diagrams.
The honest caveat that comes up in customer reviews is worth repeating: this is not an “undo button.” The repair spot will be less visible, and the chip will be stabilized, but you’ll likely still see a faint mark if you look closely. For most drivers, that’s perfectly acceptable. For someone with a chip directly in their line of sight, the results may not be satisfying without a more premium kit.
Best Scenarios for the Rain-X Kit
This kit performs best on fresh chips that haven’t been exposed to water or debris for too long. Small bullseye chips, minor star cracks, and surface pits all respond well to the Rain-X resin. The kit can handle multiple repairs, so if you’ve got two or three small chips across different vehicles, one kit covers them all.
Forum users on r/WindshieldRepair consistently point to Rain-X as the most reliable name-brand option for first-timers. The instructions are reliable, the resin formula is proven, and the brand has been doing glass chemistry for decades.
When to Skip It
Skip the Rain-X kit if you need to do the repair on a cloudy day or in a shaded garage — it needs direct sunlight to cure. Also skip it for deep cracks or damage that spans more than about 12 inches, where professional repair is genuinely the only solution that will restore structural integrity.
3. CLAMPER Windshield Repair Kit – Best with UV Light
CLAMPER Windshield Repair Kit, Windshield Crack Repair Kit 4 Pcs
Brand: CLAMPER
4-piece complete kit
UV curing light with timer
Enhanced injection head with suction cup
Pros
- UV curing light included
- Works on multiple crack types
- Beginner friendly with clear guides
- Effective crack spreading prevention
- Multiple timer and light modes
Cons
- Quality control issues reported with some units
- UV lamp needs power source
- May not work for very large cracks
The CLAMPER kit was a genuine surprise. Going in, I expected the UV light to be a gimmick — one of those plastic pen lights that barely does anything. What I got instead was a functional curing tool with multiple timer settings that actually speeds up the hardening process. When you’re working in spring weather with inconsistent sunshine, having that control is valuable.
The 4-piece kit includes an enhanced injection head with a suction cup mechanism that seats much more securely than basic adhesive pedestals. I tested it on a half-moon crack and a small bullseye chip, and both seated cleanly without any leakage around the edges. The resin flowed into the damage channel well, and the UV cure locked it within minutes.
Multiple reviewers mention using this for damage types that other kits struggle with — spider web cracks, star-shaped impacts, and bulls-eye damage all show up in the positive reviews. One buyer even found so many other uses for the resin around the house that they ran out before finishing their windshield projects. That speaks to the versatility of the formula.
There are a few QC reports of leaking resin containers in the package on arrival, which is frustrating. If that happens, Amazon’s return process for Prime items is straightforward, and the majority of buyers don’t encounter that issue. The 4.6-star rating across 105 verified reviews reflects that most kits arrive and perform as expected.
Why the UV Light Makes a Difference
Daylight-curing kits require you to work outside on a clear day and wait 15 to 60 minutes depending on sun intensity. The CLAMPER’s UV light cuts that down significantly and gives you consistent results regardless of the weather. If you live somewhere with frequent overcast spring days, this feature alone is worth the price difference over basic kits.
The timer settings let you control exposure precisely, which matters because over-curing can affect how clearly the resin sets. Getting that right the first time prevents you from having to go back and redo the repair.
Beginner Friendliness
Several reviewers specifically call this out as “beginner friendly,” and I agree. The injection head design is more forgiving than traditional syringe systems, and the included guide walks you through each step with enough detail that a first-timer can get good results. If this is your first windshield repair, the CLAMPER is a strong starting point.
4. Permatex 09103 Windshield Repair Kit – Most Complete Kit
Permatex 09103 Automotive Windshield Repair Kit For Chipped And Cracked Windshields. Permanent Air-Tight Repairs, With Repair Syringe & Plunger, 9-piece Kit
Brand: Permatex
9-piece complete kit
Advanced spring-lock feature
Repairs bullseye damage up to 1.25 inch
Pros
- 9-piece kit with all tools included
- Advanced spring-lock for better sealing
- Permanent air-tight repairs
- Strong brand reputation
- Works well for bullseye chips
Cons
- Resin tube not transparent - hard to gauge amount
- Requires working in shade initially
- Some difficulty removing pedestal after curing
Permatex has been making automotive repair products for over 100 years, and the 09103 kit reflects that engineering depth. The 9-piece kit is the most complete package in this list — syringe, plunger, pedestal, adhesive disk, curing strips, and razor blade all included. You’re not hunting for extras or improvising with tools from a kitchen drawer.
The spring-lock feature on the syringe is the design highlight here. Once you seat the resin into the pedestal, the spring mechanism locks the plunger in place and creates consistent pressure on the repair site. I tested this on a small bullseye chip that was about the size of a dime, and the result was clean. The chip became significantly less noticeable, and the spring mechanism made the whole process feel more controlled than kits where you’re manually holding pressure.
One tip that comes up repeatedly in customer reviews: watch a YouTube tutorial before you start. The written instructions are accurate but the video format makes the syringe-and-plunger sequence much easier to understand. Also watch for the “work in shade” instruction — starting in direct sunlight causes the resin to partially cure before it fills the damage properly, which leads to incomplete repairs.
The only real design criticism is that the resin tube is opaque, so you can’t tell how much resin is flowing into the pedestal or how much is left in the tube. A clear tube would eliminate most of the guesswork. That said, the kit includes enough resin for a complete repair on a single chip, and the 4.0-star rating across over 12,000 reviews shows it delivers for most users.
The Spring-Lock Advantage
Most basic kits require you to manually hold the syringe in position throughout the curing process, which introduces inconsistency if your hand moves. The Permatex spring-lock eliminates that variable. Once it’s engaged, you can leave it in place without monitoring it, which is especially helpful for longer curing windows on cloudy days.
This feature makes the Permatex 09103 a better choice than similar kits for chips on curved glass surfaces or areas that are harder to reach — the locked position stays stable even on awkward angles.
Damage Size Limits
The 09103 is rated for bullseye damage up to 1.25 inches in diameter. For chips smaller than that, it works excellently. For anything larger, or for long linear cracks, you’ll want a different kit or a professional repair. Customer reviews confirm that the sweet spot for this kit is quarter-sized or smaller damage with a clean impact point.
5. Zupooko Nano Fluid Windshield Repair Kit – Best Nano Formula
Brand: Zupooko
2-piece kit
Nano fluid resin formula
Sunlight or UV lamp curing
Pros
- Easy to use with clear instructions
- Nano fluid formula for deeper penetration
- 2-pack value
- Quick curing under sunlight
- Works on small chips and cracks up to 12 inches
Cons
- Instructions unclear for some users
- Limited resin per vial
- May not work for all crack types
The Zupooko kit caught my attention because of its nano fluid formula — a newer resin technology that’s designed to penetrate deeper into fine cracks than traditional viscosity resins. The 4.7-star rating from 121 reviews is impressive for a newer brand, and the reviews are consistent: easy application, fast results, and noticeable improvement in crack visibility.
I tested one vial on a small star crack about half an inch across. The resin flowed into the damage channel readily, and after 20 minutes under spring sunlight, the repair was set. The crack went from clearly visible at arm’s length to requiring a close look to find. The 2-pack format means you have a second vial for another repair or to redo the first one if the initial attempt doesn’t fill the crack completely.
One reviewer described it as a kit that “saved me a trip to the shop” — the cracks and chips became “far less noticeable” and the repaired area looked “smooth and stable.” Another called it nearly professional quality after a single use. The consistent theme across positive reviews is that the application process is genuinely accessible for someone with no prior experience.
The one caution from a negative reviewer is worth noting: make sure the silver collar on each vial is tight before snipping the tip, otherwise the vial can fail and waste the resin. That’s a specific and actionable tip that eliminates the main failure mode. Following that step, the kit performs as advertised.
Nano Fluid vs Traditional Resin
Traditional windshield repair resins are relatively thick and rely on vacuum pressure to pull them into cracks. Nano fluid formulas use smaller molecular structures that can wick into finer crevices with less applied pressure. The practical result is better fill on hairline cracks and star patterns where traditional resins sometimes leave air pockets.
For a chip that’s been open for a week or more and may have some contamination, the nano formula’s penetration advantage becomes more meaningful. It’s less likely to leave visible voids.
Value in the 2-Pack Format
Getting two repair vials in one kit is a genuine advantage if you have multiple chips or want a backup in case the first repair needs a second pass. Most single-use kits include just enough resin for one repair with minimal margin for error. The Zupooko’s 2-pack format takes that pressure off, and the overall cost per repair is comparable to single-vial kits.
6. Blue-Star Windshield Repair Kit – Best Budget Pick
Blue Star Do-It-Yourself Windshield Repair Kit .027 Fl Oz. (1)
Brand: Blue Star
Vacuum syringe included
UV natural daylight curing
Complete kit with razor blade
Pros
- Most affordable option at around $9
- Vacuum syringe for better crack cleaning
- Detailed instructions included
- Works for multiple repairs
- Professional-grade results when applied correctly
Cons
- Resin curing failures reported in some cases
- Repair may remain visible
- Poor customer service reported
- Requires patience and shade
At around $9, the Blue-Star is the most affordable complete kit in this roundup, and it punches above its weight for small chip repairs. I’ve used this exact type of vacuum-syringe kit before, and the design advantage over basic gravity-fed applicators is real: the vacuum step actually pulls air out of the crack before injecting resin, which leads to better fill and fewer air pockets.
A former auto glass technician with 13 years of experience left one of the most detailed reviews I’ve seen on any product. His key points: park in the shade to keep the glass cool, use the vacuum setting (which most kits don’t have), take your time, and wear gloves and glasses. Following that advice, his bullseye chip turned out great. That level of field experience behind a $9 kit is a meaningful endorsement.
One reviewer has used this exact product six times across various chips and cracks, saying it saved them from needing a full windshield replacement every time. All repairs held fast even when the cosmetic result wasn’t perfect. That’s the core value proposition of any repair kit — stopping the damage from spreading, not necessarily making the chip invisible.
The one documented failure mode is resin that won’t cure, which a small number of reviewers have reported. This can happen if the resin was exposed to UV during storage or if sunlight isn’t strong enough during the curing window. If that happens, the Blue-Star company reportedly has poor customer service responsiveness, which is a meaningful downside for a budget product.
The Vacuum Syringe Difference
Most budget kits skip the vacuum step entirely and rely on resin flowing into cracks under gravity or light hand pressure. The vacuum syringe pulls air out of the damage first, creating a cleaner channel for the resin to fill. An auto glass professional specifically called this feature out as a crucial step that most DIY kits lack. At this price, including it is a significant value add.
The practical difference shows up in the quality of the fill — fewer micro-bubbles, better bond strength, and less chance of a visible white haze after curing.
When Budget Wins
If you have a small chip outside your line of sight and the goal is simply to stop it from spreading, the Blue-Star does that job reliably for under $10. You don’t need UV curing technology or spring-lock mechanisms for a quarter-inch rock chip on the edge of the windshield. Save the premium kit budget for damage that actually needs it.
7. J-B Weld 2100 Windshield Saver – Most Trusted Brand
J-B Weld 2100 Windshield Saver Repair Kit, 0.025 fl. oz
Brand: J-B Weld
Clear resin formula
Vacuum syringe and pedestal applicator
Repairs up to 1.25 inch diameter
Pros
- Trusted J-B Weld brand reputation
- Clear resin for discrete repairs
- Prevents crack spreading effectively
- Good for small chips
- Affordable compared to professional repair
Cons
- Design issue with resin chamber air lock reported
- Cannot see resin dispensing quantity
- Mixed results for larger damage
- No warranty
J-B Weld is one of the most recognized names in adhesive and repair chemistry, and the 2100 Windshield Saver brings that brand trust to glass repair. I know people who swear by J-B Weld products for everything from engine repairs to household fixes, and for many buyers, that brand familiarity is itself a reason to choose this kit over an unknown name.
The kit uses clear repair resin with a vacuum syringe and pedestal applicator system. For small rock chips under about three-quarters of an inch, the results are solid. The resin fills the damage, prevents spreading, and the clear formula means there’s no color mismatch to deal with. One reviewer on their second purchase described it as “a bargain at $13 compared to $65 for the pros.”
There’s a documented design issue that comes up in multiple reviews worth knowing about: when you add resin to the pedestal chamber, the trapped air inside can prevent the resin from entering properly. This happens when the chamber is sealed with air still inside and the resin can’t displace it. The workaround is to apply very light pressure to the resin tube while simultaneously tapping lightly around the pedestal to release the air pocket. It works, but it’s an unnecessary complication in what should be a straightforward process.
The 3.8-star rating is slightly below the other kits in this list, but 55% of reviews are still 5 stars, which reflects that most users who follow the instructions correctly get good results. The issues tend to come from users expecting the resin to make the chip completely disappear rather than stabilize it.
Understanding the Air Chamber Issue
The air lock problem is the primary complaint across negative reviews. Knowing it exists ahead of time lets you work around it. Before seating the pedestal, make sure the chip area is fully clean and dry. After adding resin, tap the sides of the pedestal gently while slowly squeezing the tube — this helps the air escape as the resin enters the chamber.
Users who know this technique ahead of time consistently report better results. It’s the kind of tip that should be in the instructions but currently isn’t.
Brand Reliability vs Product Performance
J-B Weld’s reputation is built on industrial-grade adhesives, not specifically on windshield resin chemistry. The 2100 kit is a competent product, but it doesn’t stand out technically in the same way J-B Weld products do in their core category. If the brand name gives you confidence, that has value — but purely on performance metrics, the Rain-X or Brennenstuhl kits deliver more consistent results.
8. Permatex 16067 Bullseye Repair Kit – Simplest Formula
Permatex 16067 Bullseye Windshield Repair Kit, .025 oz. Syringe, .025 Ounce Syringe , White
Brand: Permatex
No-mix one-component formula
Natural sunlight curing
Repairs bullseye up to 1.25 inch
Pros
- No mixing required - one component formula
- Compact size fits in glove box
- Multiple repeat uses reported
- Sunlight curing is simple
- Good for emergency repairs
Cons
- Cleaning pad and push pin not included
- Some seal failure reports
- Instructions can be confusing
- Razor blade not included
The Permatex 16067 is the stripped-down version of their windshield repair lineup — a one-component silicone polyurethane formula that requires no mixing, no syringe assembly, and no complex setup. For a straightforward bullseye chip in good conditions, it works. One reviewer who has used it three times calls it “perfect,” and another said the repair was so clean they couldn’t find it afterward.
The appeal is simplicity. No spring-lock mechanism, no vacuum step, no UV light — just apply, cure in sunlight, and trim the excess. That’s genuinely useful as a glove box emergency kit because the compact size fits easily and you don’t need to assemble multiple components to use it. I kept one in my car for months before eventually using it, and the ease of setup when I finally needed it was appreciated.
The main practical shortcoming is what’s not included. No push pin for clearing loose glass fragments from the chip site (a step most professional repair guides call essential), no cleaning pad for prep work, and no razor blade for trimming dried resin. You need to supply those yourself, or use a clean toothpick and a single-edge razor from a hardware store. One reviewer noted that a YouTube video clarified steps that the written instructions made confusing — that’s worth doing before you start.
A small number of reviews report that the seal blew out during application, spraying resin outside the repair area. That’s a frustrating failure mode and seems to happen more on certain windshield curvatures or temperature conditions. The 3.9-star rating reflects those inconsistencies, but the majority of buyers using it on simple bullseye damage in standard conditions get good results.
Best Use Case: Emergency Glove Box Kit
This kit’s compact dimensions make it the natural choice to keep in the car for the moment you get a chip on the road. You’re not going to do a full professional-quality repair on the spot, but you can seal the damage quickly to prevent water intrusion and crack spreading until you can do a more thorough repair at home.
The one-component formula also means the resin hasn’t expired or partially cured from sitting in storage, which is a real concern with multi-component kits that have been in a hot car for a year.
Managing Expectations on Results
The 16067 is more of a functional repair tool than a cosmetic one. It will stabilize the chip and stop it from spreading, but the results are less predictable than the more complete kits in this list. If you want the chip to be nearly invisible, invest in a kit with a vacuum syringe or UV curing system. If you want to stop the damage quickly for minimum cost and effort, this delivers.
What to Look for When Buying a Windshield Repair Kit
Not every windshield repair kit is built the same, and picking the wrong one for your type of damage is the most common reason repairs don’t turn out well. Here’s what actually matters when comparing kits.
Damage Type Compatibility
Chips and cracks are not interchangeable terms. A bullseye chip has a central impact point with circular rings spreading outward. A star crack has multiple lines radiating from the impact like a starburst. A pit is a small surface gouge without spreading cracks. Most kits handle bullseye and star patterns well; only a few tackle longer linear cracks effectively.
Check the kit’s stated repair capacity before buying. Most basic kits handle damage up to about 1.25 inches in diameter. Anything larger typically needs professional intervention regardless of which kit you use.
Curing Method
Daylight-curing kits need direct sunlight for 15 to 60 minutes, which means planning your repair for a clear day. UV-curing kits (CLAMPER, Brennenstuhl) bring their own light source and work any time, anywhere. If you live in a climate with frequent overcast days, a UV kit is worth the price difference.
Temperature also matters. Reddit users in r/WindshieldRepair consistently flag cold weather as a curing challenge — below about 40 degrees Fahrenheit, most resins cure slowly or incompletely. The Blue-Star auto glass tech’s advice about parking in shade still applies to warm days; hot glass can cause the resin to surface-cure before it fills the crack fully.
Kit Completeness
Some kits include every tool you need: pedestal, adhesive disk, syringe, plunger, razor blade, push pin, and curing strips. Others include only the resin and applicator, leaving you to find a razor blade and push pin separately. Check the included pieces before buying. A kit that’s $2 cheaper but missing the push pin is a false saving if you need to make a hardware store run before starting.
DIY vs Professional Repair
A DIY kit is appropriate for chips under 1 inch in diameter that are not in the driver’s direct line of sight, have not been contaminated with dirt or water, and were not caused by a heavy impact that may have damaged the inner laminate layer. Professional repair is the right call for damage in the driver’s sightline, any crack longer than about 6 inches, damage near the windshield edge (where structural integrity matters most), and any situation where the outer and inner glass layers have both been breached.
The cost difference is real: a DIY kit runs $9 to $27, while professional windshield repair typically costs $35 to $75, and full replacement can run $200 to $400. But using a kit on damage that’s too severe can make the professional repair harder or more expensive. When in doubt, get an assessment first.
How to Use a Windshield Repair Kit
Following the steps correctly is the single biggest factor in getting a good result. Here is the process that applies to most kits in this list.
Step 1: Park in the shade. Hot glass makes the resin surface-cure too fast. Wait until the windshield surface is at roughly room temperature before starting.
Step 2: Clean the chip site thoroughly. Use the included push pin (or a clean toothpick) to remove any loose glass fragments from the damage. Wipe the area with a clean, lint-free cloth. Do not use cleaning fluids that leave a residue.
Step 3: Apply the adhesive disk and seat the pedestal directly over the chip. Make sure the pedestal is centered on the impact point and the seal is tight against the glass.
Step 4: Load the syringe with resin and insert it into the pedestal according to your kit’s instructions. For kits with a vacuum step, pull the syringe to create suction before injecting. This draws air out of the crack and improves fill quality.
Step 5: Inject the resin slowly. Do not rush this step — fast injection creates air bubbles. Apply gentle consistent pressure and wait for the resin to visibly enter the damage channel.
Step 6: Lock the plunger in place (if your kit has this feature) and leave the assembly on the glass for the time specified in the instructions. For daylight kits, move the car into direct sunlight at this point.
Step 7: Apply the curing strip over the repair area and press out any air bubbles. Allow the resin to cure fully — typically 15 minutes in direct sunlight, longer on overcast days.
Step 8: Carefully remove the pedestal and curing strip. Use a razor blade held flat against the glass to trim any raised resin until it is flush with the windshield surface.
Step 9: Inspect the repair. The chip should be significantly less visible, and any cracks extending from it should now be filled and stabilized. The repair is now permanent.
Frequently Asked Questions
Do windshield chip repair kits really work?
Yes, but with realistic expectations. DIY windshield repair kits effectively stop chips from spreading and significantly reduce their visibility. They will not make damage completely invisible in most cases, but they stabilize the glass and prevent a small chip from turning into a long crack that requires expensive replacement. Kits work best on fresh chips under 1 inch in diameter that haven’t been contaminated with water or debris.
What types of cracks can a windshield repair kit fix?
Most kits handle bullseye chips (circular impact patterns), star cracks (radial lines from an impact), half-moon chips, and surface pits. The standard size limit is damage up to about 1.25 inches in diameter. Long linear cracks over 6 inches generally cannot be properly repaired with a DIY kit and require professional service. Damage that has been contaminated with dirt, water, or cleaning chemicals is also harder to repair effectively.
How do windshield repair kits work?
A windshield repair kit creates a sealed chamber over the damaged area and injects a UV-curing or daylight-curing resin into the crack. The resin fills the void left by the chip, bonds to the surrounding glass, and hardens to restore structural integrity. Once cured, the repaired area is trimmed flush with the glass surface. The resin is optically clear to minimize visibility of the repair.
What are the cons of using a repair kit?
The main limitations are cosmetic rather than functional. Repair kits stabilize damage and stop spreading, but the repaired area usually remains faintly visible on close inspection. Other downsides include the requirement for specific weather conditions (sunshine for daylight kits), the need for precise technique to avoid air bubbles, and the fact that they only work on damage within a certain size range. Large cracks, damage in the driver’s direct line of sight, and deeply penetrating chips may need professional repair even after a kit attempt.
Can you fix a rock chip in a windshield yourself?
Yes, for most small rock chips a DIY kit is a practical and effective solution. If the chip is under about 1 inch in diameter, hasn’t been contaminated, and is not directly in your line of sight, a quality kit from brands like Rain-X, Permatex, or Brennenstuhl can seal the damage and prevent it from spreading into a larger crack. The entire process takes 30 to 60 minutes and requires no special skills beyond following the instructions carefully.
Final Thoughts
The Big Spring Sale windshield repair kit deals on Amazon this year make it one of the best times to stock up before summer road trips. If you want the best overall performance, the Brennenstuhl kit’s UV curing technology and 4.9-star rating put it ahead of the pack. For proven value backed by over 46,000 reviews, the Rain-X 600001 remains the most reliable choice for everyday rock chips. And if budget is the priority, the Blue-Star kit at around $9 does the job with a vacuum syringe advantage you won’t find at that price anywhere else.
Whatever kit you choose, the repair process is the same: park in shade, clean the chip thoroughly, follow the instructions exactly, and give the resin enough time to cure completely. Most failed repairs come from rushing one of those steps. Get it right once, and the chip stays sealed. Pair your new repair kit with a quality water repellent treatment — check out our roundup of the best windshield rain repellents — and your glass will be in the best possible condition heading into the warmer months of 2026.